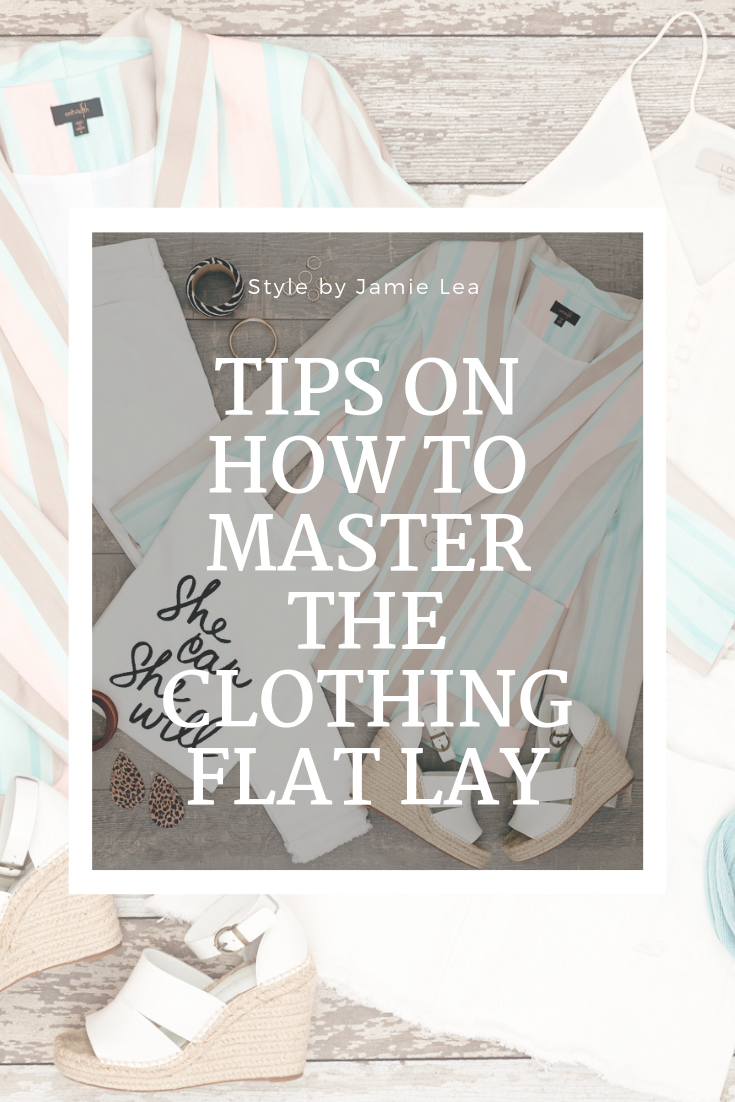
 Hey ladies! Your request has been granted! For those of you that have been wanting to know how I accomplish my detailed flat lays, here you are! It has been a long time coming, so I hope it is super helpful!
I have worked on perfecting my flat lays for quite some time. I am going to help guide you along but it is up to you how much you practice and actually get good at it yourself. You may also discover along the way the things that will work best for you and your environment. Hopefully these tips will help you start the process and give you something to reference it you need it. Also, don’t be afraid to leave me questions in the comments at the end of the post or message me on instagram. I am happy to help!
I had to break up my flat lay tips into two posts. This one is Tips on How to Master the Clothing Flat Lay and the next one will be about Lighting & Equipment Set Up for a Flat Lay.
Technical Layout for Instagram:
- A flat lay for instagram can be done in a square or what they call portrait. The square is 1080 by 1080 and the portrait is 1080 by 1350. I usually create all of mine in a square because it is a lot easier.

Square: 1080 by 1080
Protrait: 1080 by 1350 - You will have to crop the photo to a 1080 by 1080, a 1:1 ratio, or 1080 by 1350, a 4:5 ratio. When setting up your clothing you have to think about how long and how wide all of your pieces are. The closer your camera is, or the more zoomed in it is, the less you will get in the picture when you crop it. This is actually very different for a phone and a DSLR camera. The file size of the photo that comes out is very different for each of these. This also affects your cropping ability. You will have to practice taking some photos to see how you need to set everything up.
- After you have figured this out remember your set up. If you have to lay poster board down and draw a box around the area to put your clothing than do so. This will save you a lot of time when you go to take the next photo. This is why I have made a specific set up in my house. When I go to take a photo I already know my limitations and it takes me less time. You want to be able to concentrate on your outfit and not the set up!

Pro Tips:
- The best place to set up your flat lay is the floor. You can use other surfaces if you have something tall enough to hold the camera or a tall enough ladder. Remember, you have to be able to get a good distance above the flat lay to get everything in it.
- There is an art to this and you will understand once you start. You will think it is easy and then see the picture and realize how terrible you laid everything out. The camera “sees” things differently than you do. You may think something looks great and perfect with your human eye and your photo will tell a different story. The best advice I can give you is to set it up and take a picture to see what needs to change and repeat until you get the perfect photo. I often take 10 or more pictures from all my adjustments until I get the final one. This is actually a low number compared to what I use to take when I first started.
- Keep trying!!!! Just remember with everything new that we do it takes practice and more practice. You will not achieve an amazing and award winning flat lay on your first, second or third try! It will take you lots of time and just trying different things. As you continue you will naturally improve with each one without even knowing it!
Advice on Laying Out Your pieces:
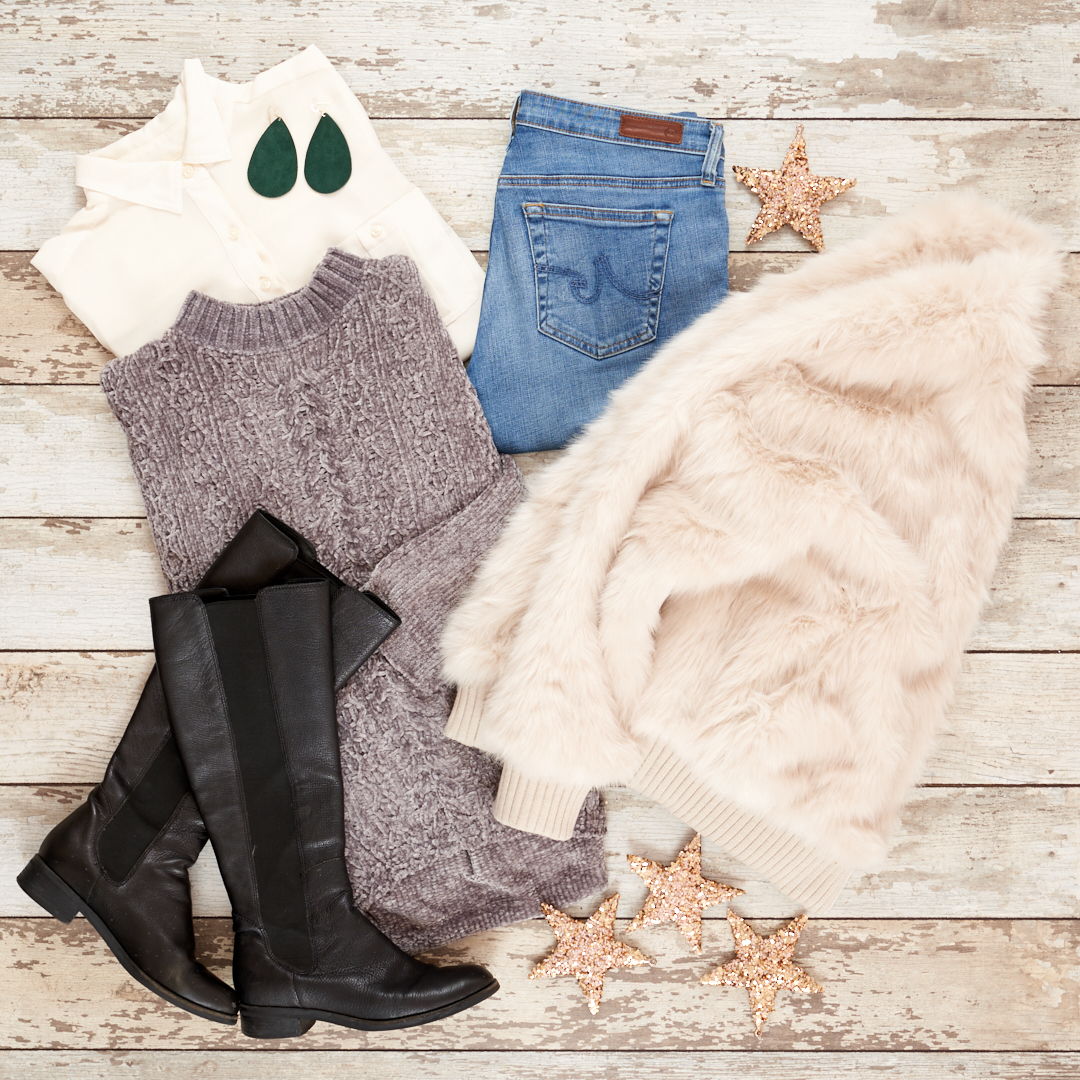
- If you have multiple pieces like a top, bottom, jacket, jeans, jewelry, handbags and shoes try to create balance. Our human eye likes symmetry and balance. This can not always be achieved in a flat lay but when it is they are always the best ones. The balance comes from your colors and size of your pieces and how they are placed. Dark or bright colors and whites always stand out the most. If you have a white top on one side of the pic something needs to balance it out on the other side. Maybe a white flower or adding a white bag instead of a black bag.
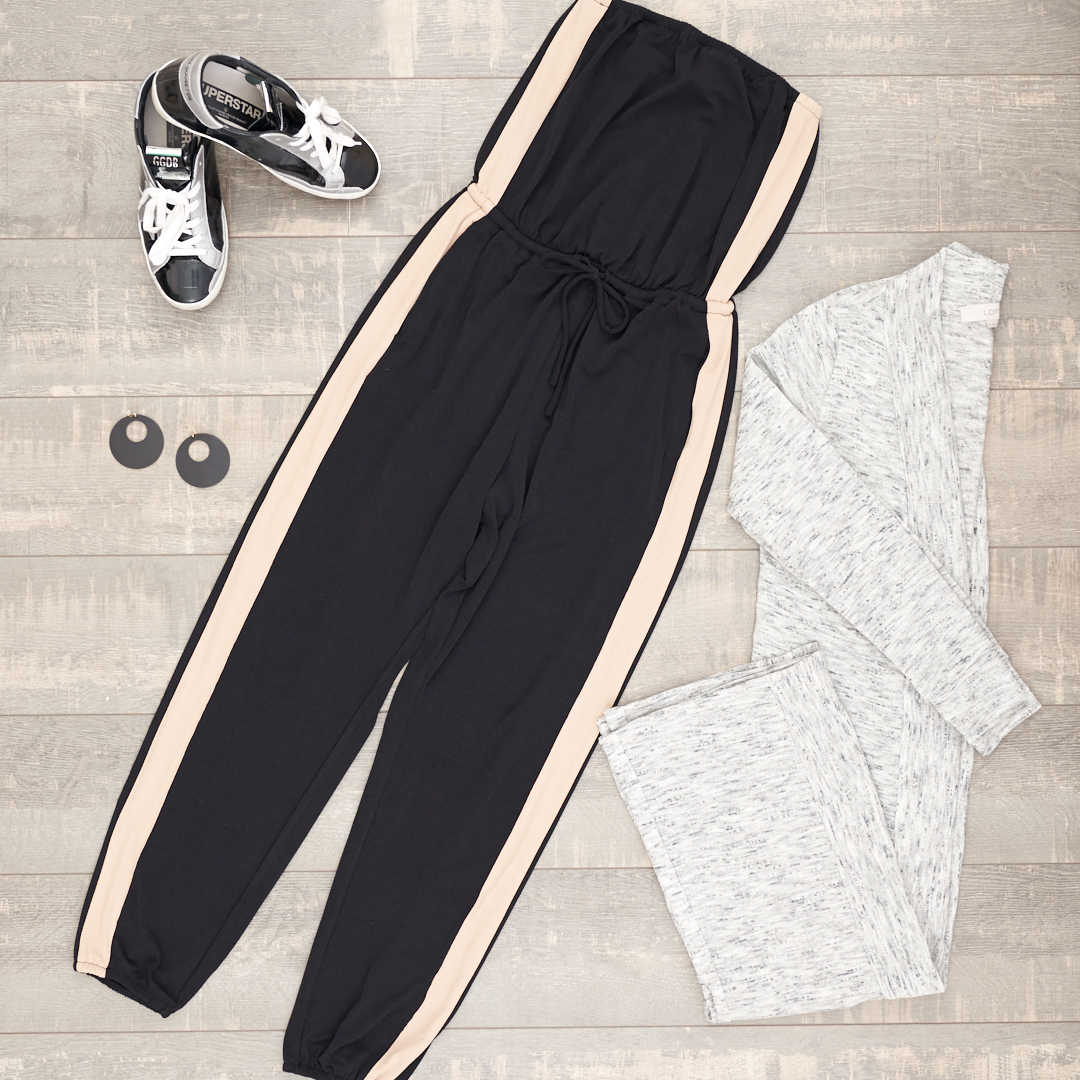
- If you have trouble achieving balance in the photo try to place the dominant piece center in the flat lay and build around it. If you have two dominant pieces like a top and bottom have them share the center.
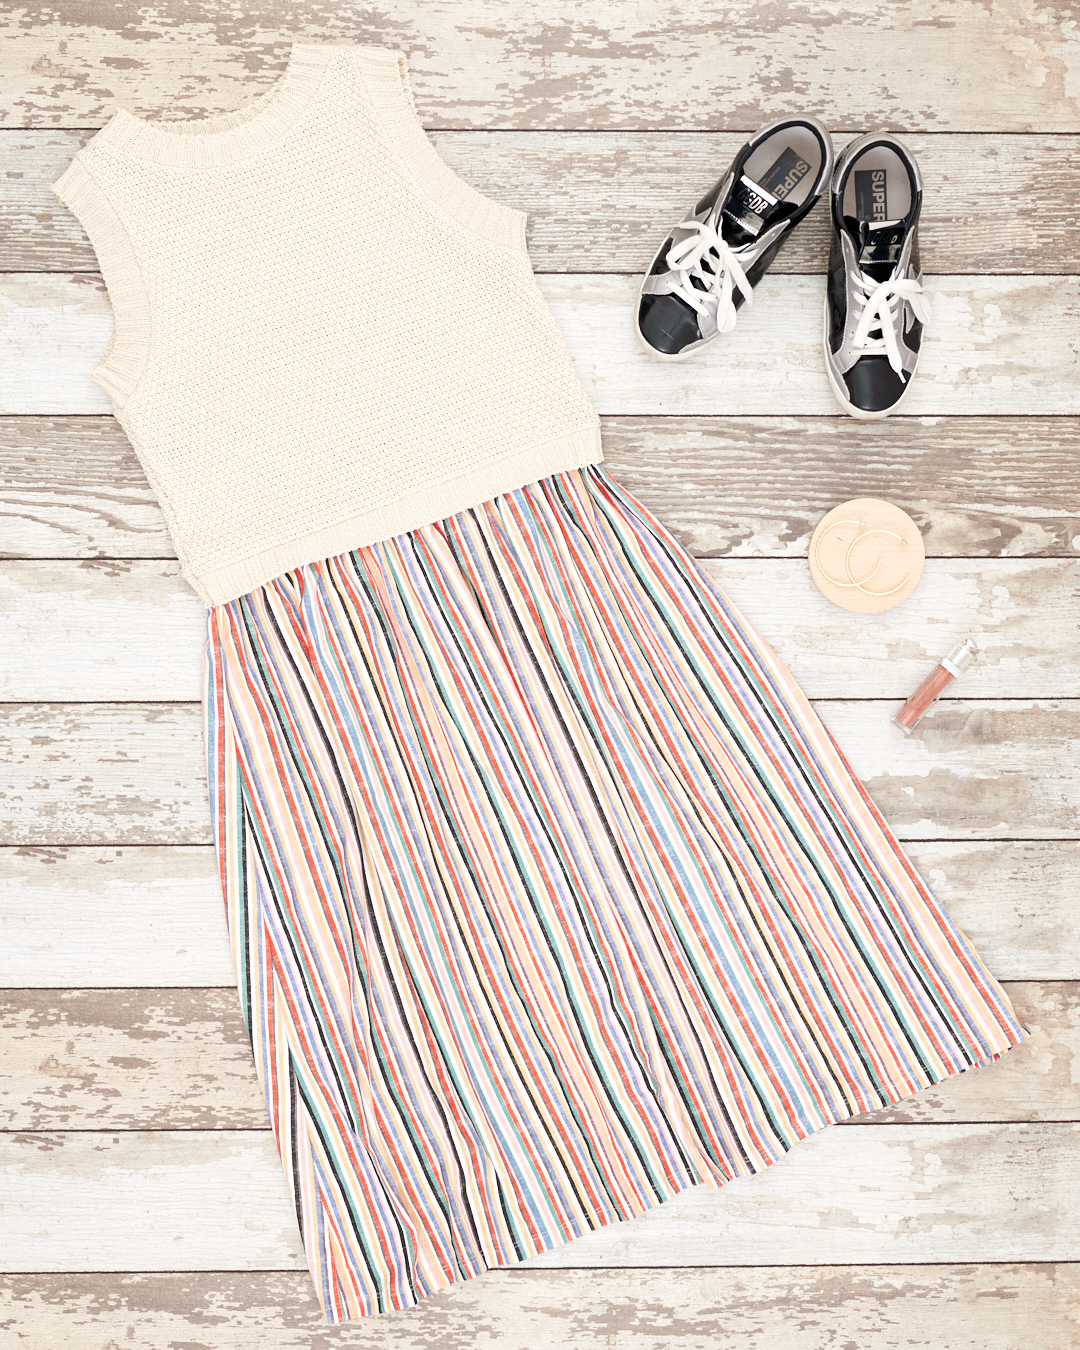
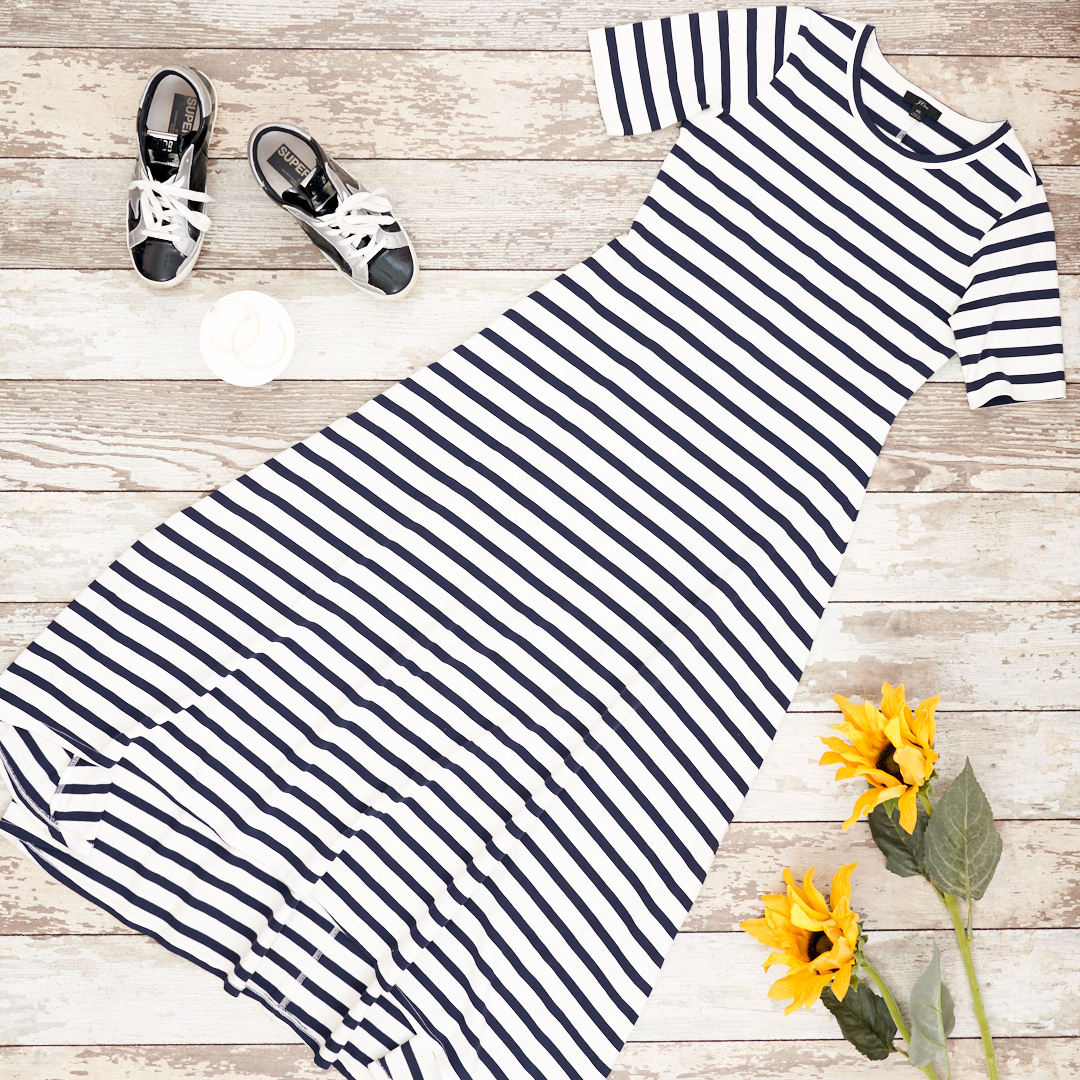
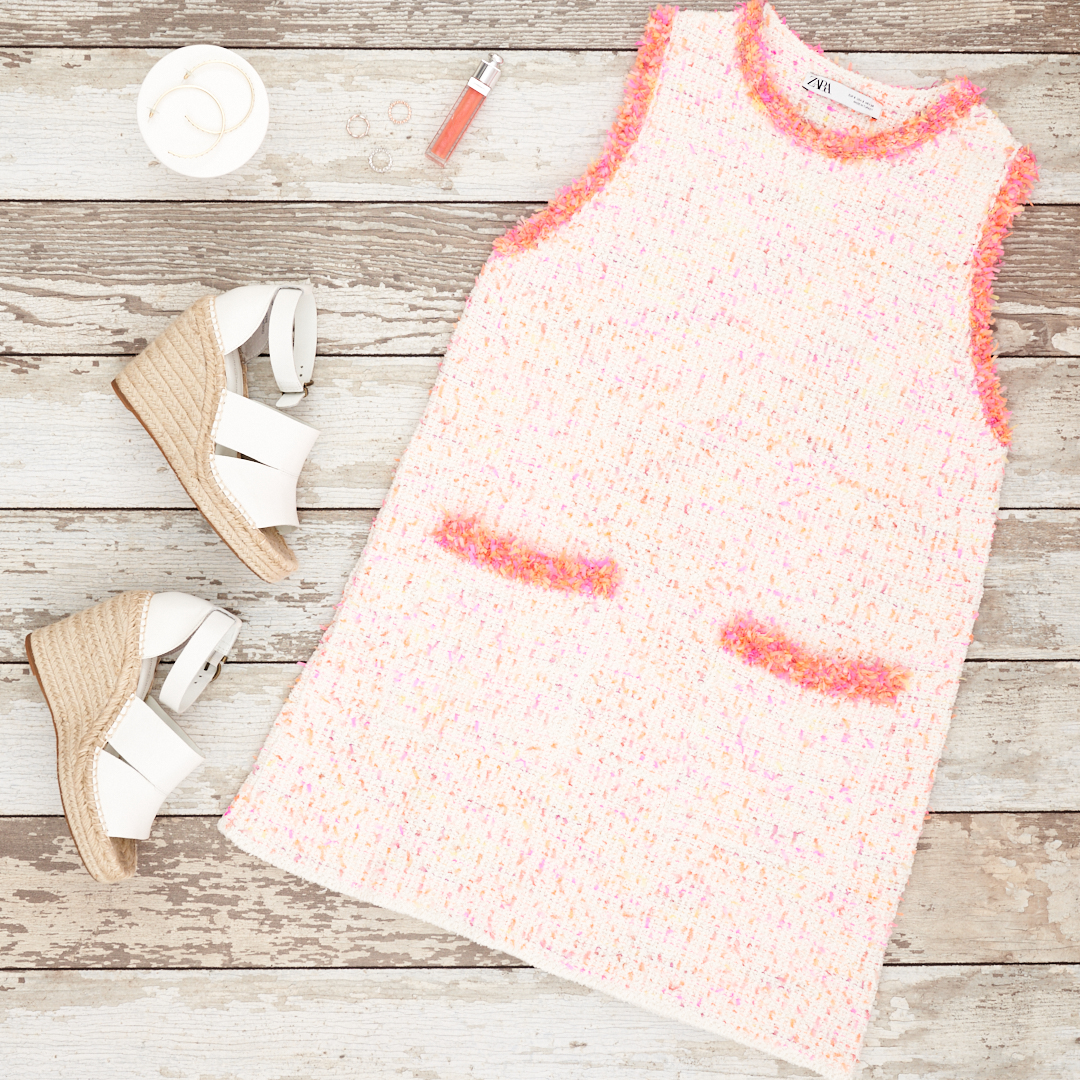
One Dominant Dress
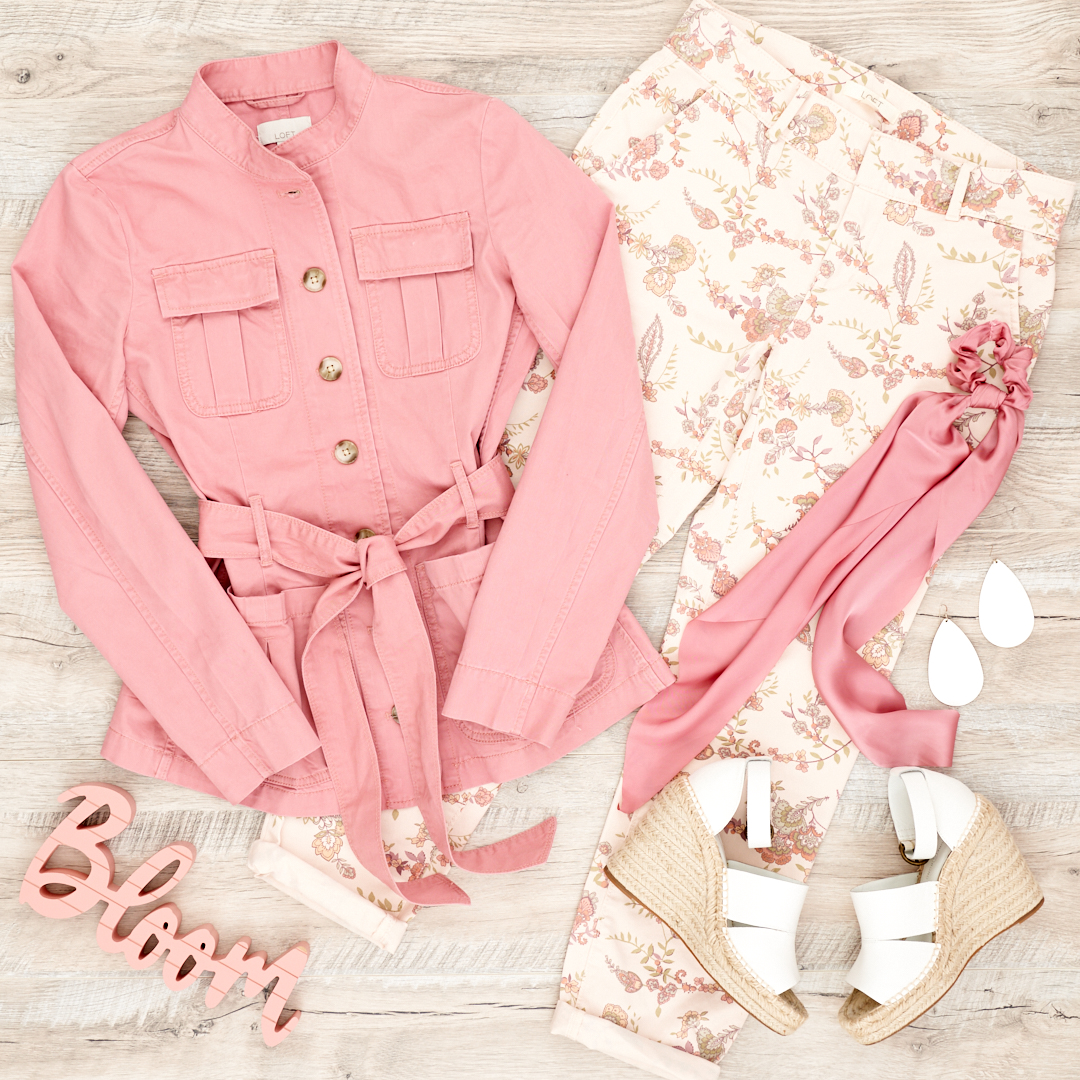
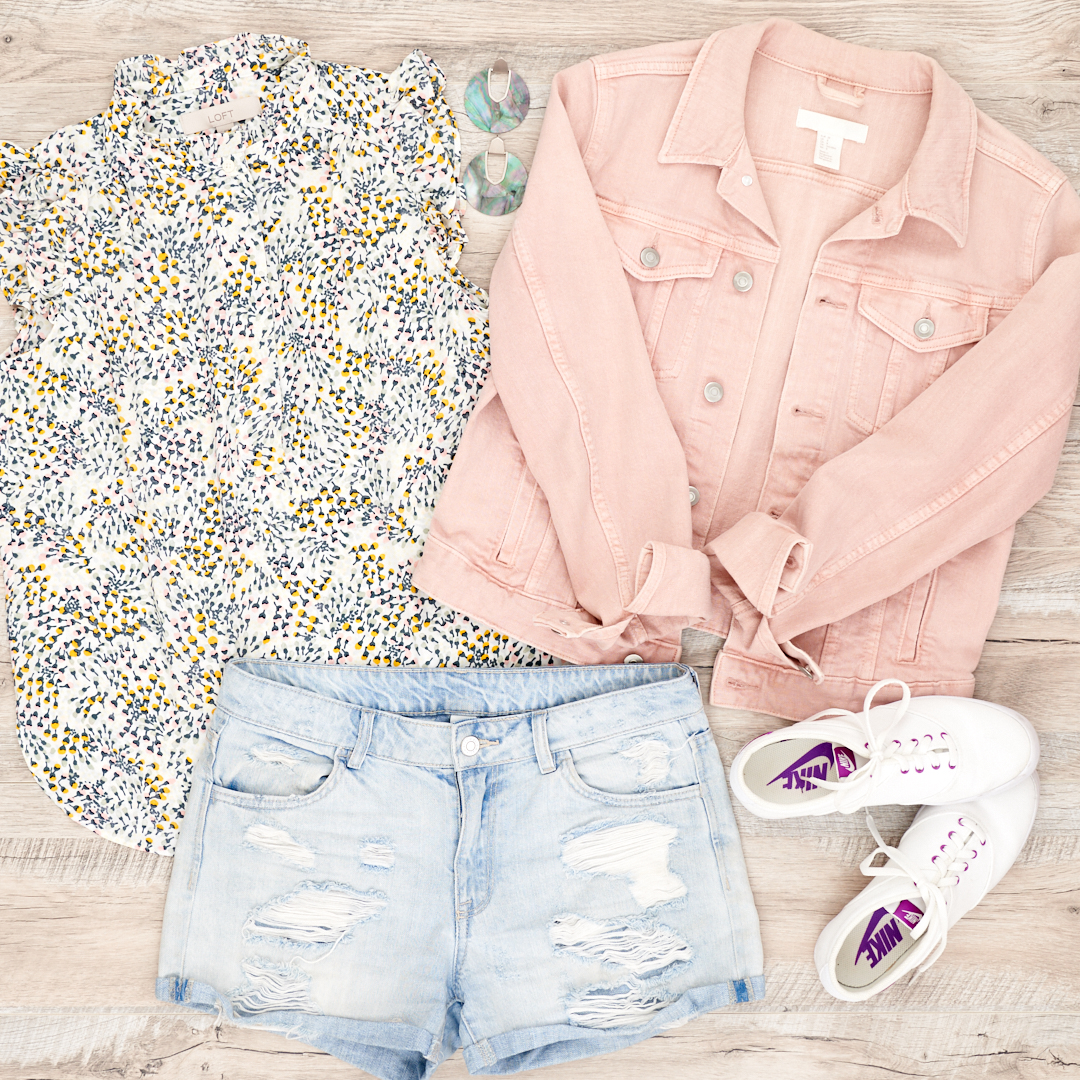
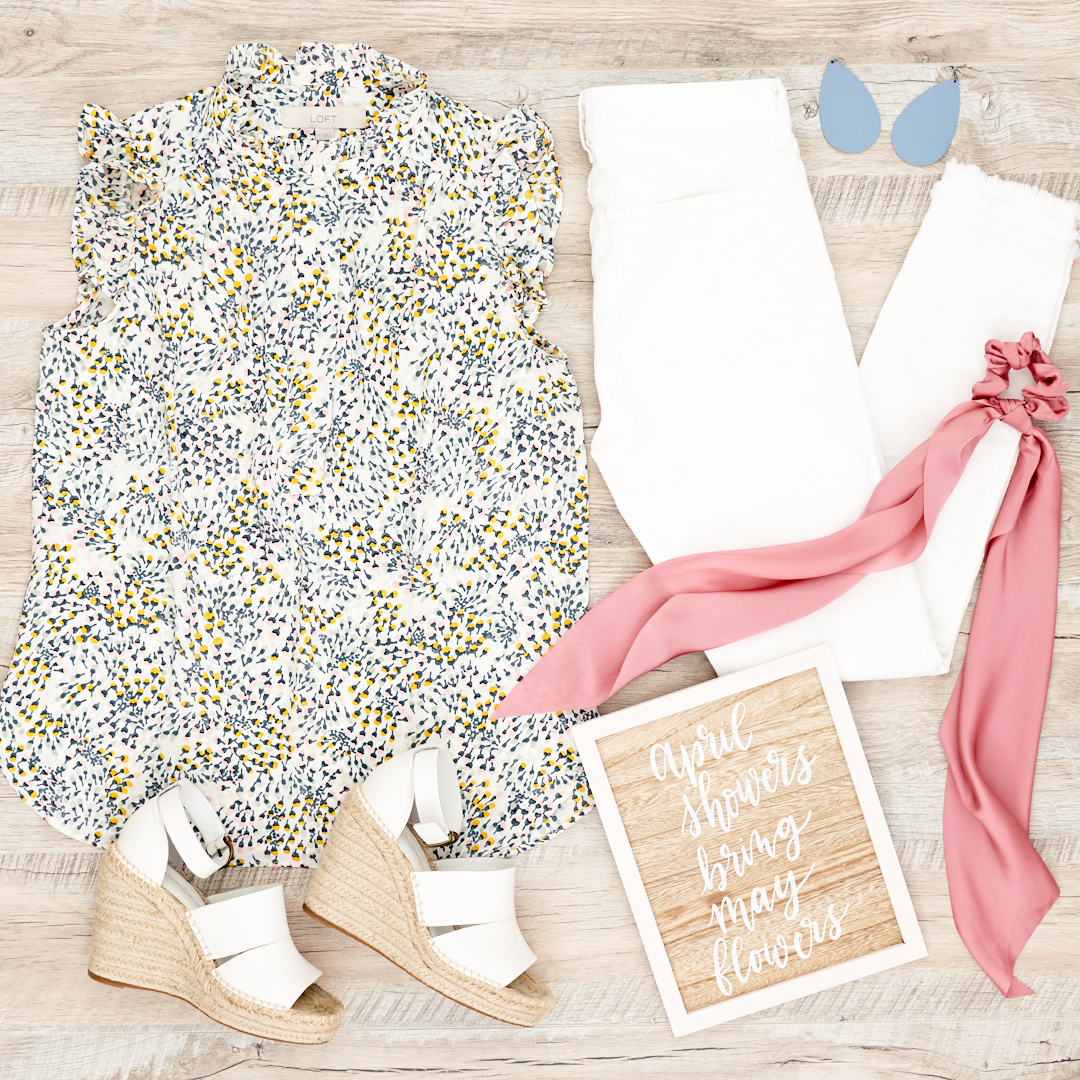
Top & Bottom are both dominant pieces - Cover your space. Try to leave the same amount of space all around the flat lay to help create symmetry. I try to cover as much of the open area for the flat lay as I can so you see the product and not the background.
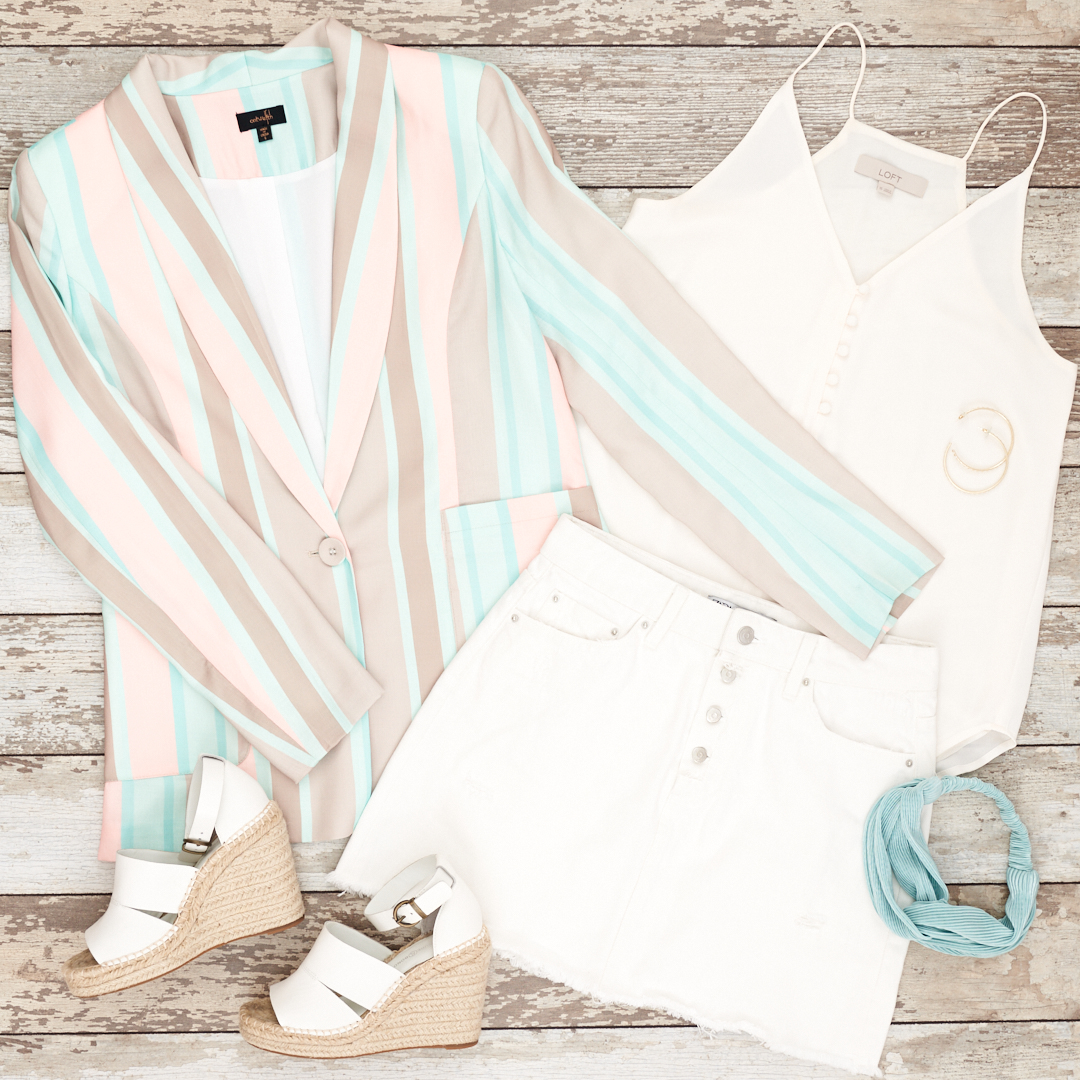
Example of Space Coverage
Example of Space Coverage

- Don’t be sloppy! Your clothing should be steamed or ironed and not wrinkly! Smooth it out when you lay it out. The camera will pick up things you can’t even see so get it as perfect as you can to minimize imperfections.
- Make sure the outfit on the flat lay can translate to real life. Meaning that you would actually wear the outfit. Pro Tip: Try it on before choosing to put it on the flat lay!
Flat Lay Photo
Life-styled Photo - Use props in your photo with the clothing. Sometimes I add flowers or dishes to display jewelry. This can help to create a balanced and perfect photo. Especially for those things that are not easily visible like small earrings, rings or necklaces. Pro Tip: Choose props that make sense for the time of year and your outfit.
Lipgloss & Tiny Cupcake Stand for Earrings are Props
The Cute Sign is A Prop - Always start with your main outfit pieces and build from there. An example would be to lay out your pants and top and then add the accessories and shoes. Play around and see what you can come up with. Fold the pieces different ways to see how they display the best.
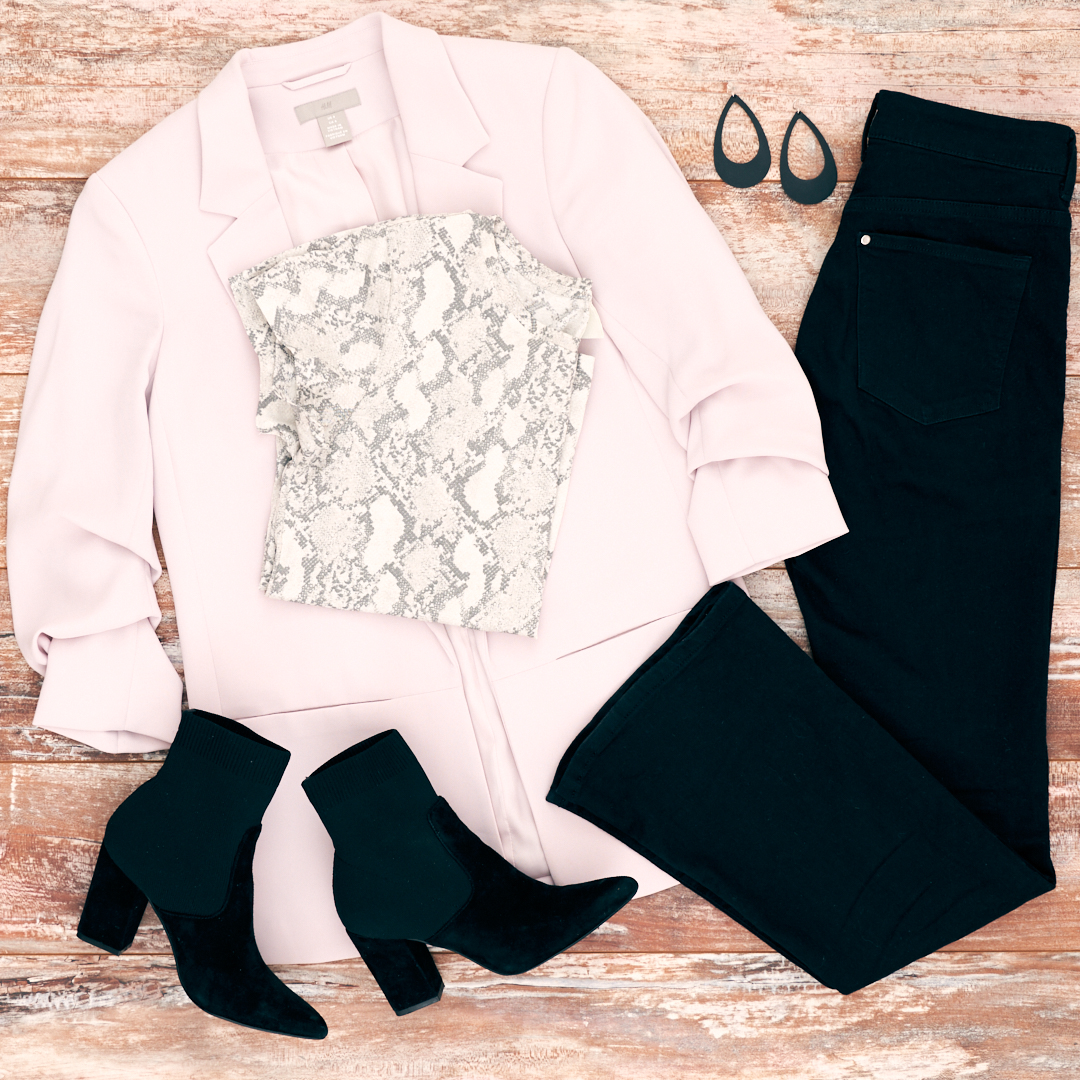
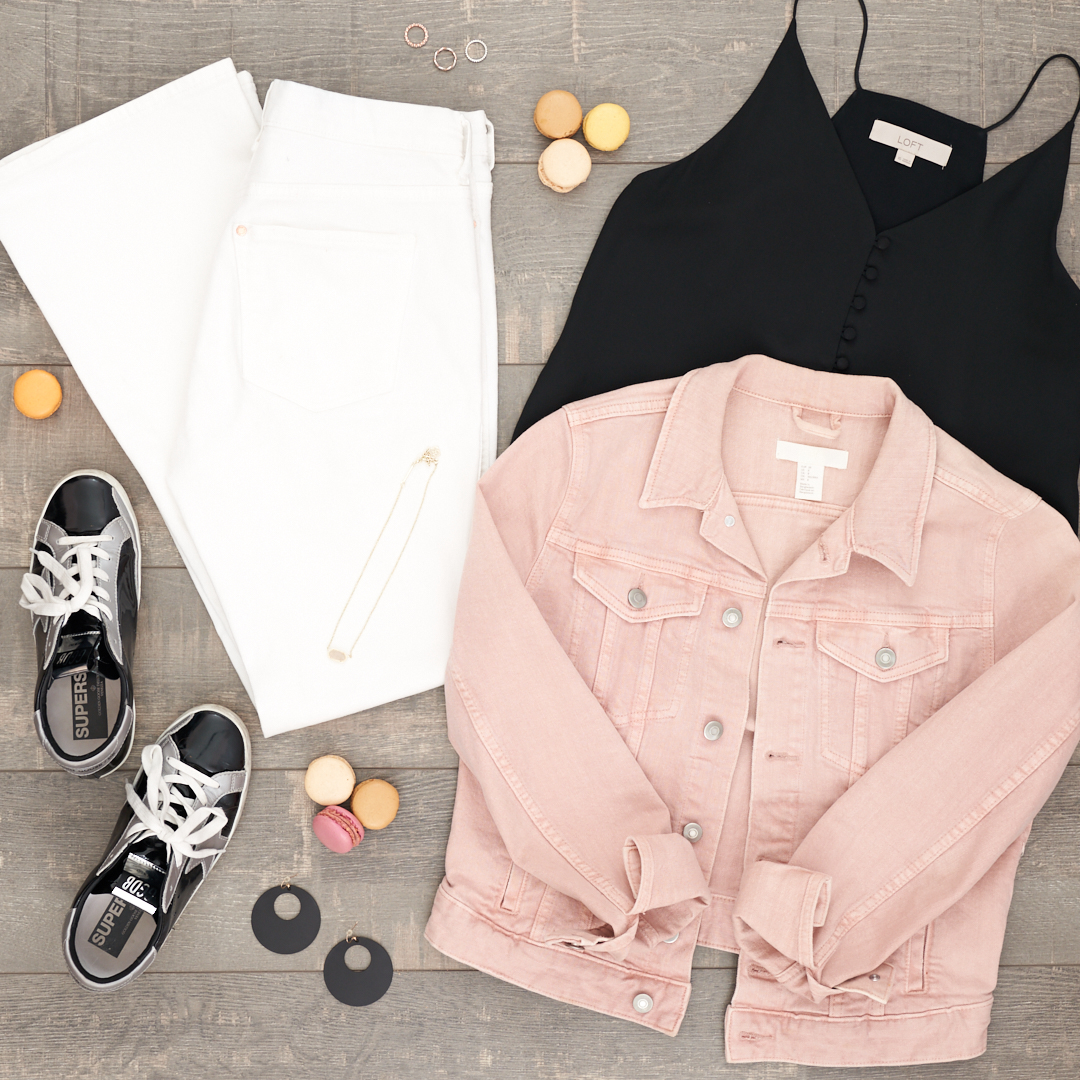
- If you have multiple top pieces like a jacket, top and camisole you can always layer the top under the jacket and fold the camisole to lay it near or on top of the others. This can create depth and will take up less space. Pro Tip: If you put the top and jacket together on the same hanger you can get it layered perfectly and just lay that down on the backdrop and take the hanger out.
Example of Layering from 2018
Example of Layering from 2018
Example of Layering from 2019
Layering & Props from 2019 - If you just can’t make it work, move on. This has happened to me and you just have to move on and create a different outfit.

I hope these Tips on How to Master the Clothing Flat Lay has been helpful! If you are struggling with something that I did not mention here than please ask me about it in the comments. Be on the lookout for the next one on Lighting & Equipment Set Up for a Flat Lay early next week.
Thanks so much for reading and your support!
![]()

2 Comments
I was waiting for this post and so glad it’s finally up! I loved all the tips and I’m going to try it for future flat lays for (when needed).
Thanks girl! I hope it was helpful!