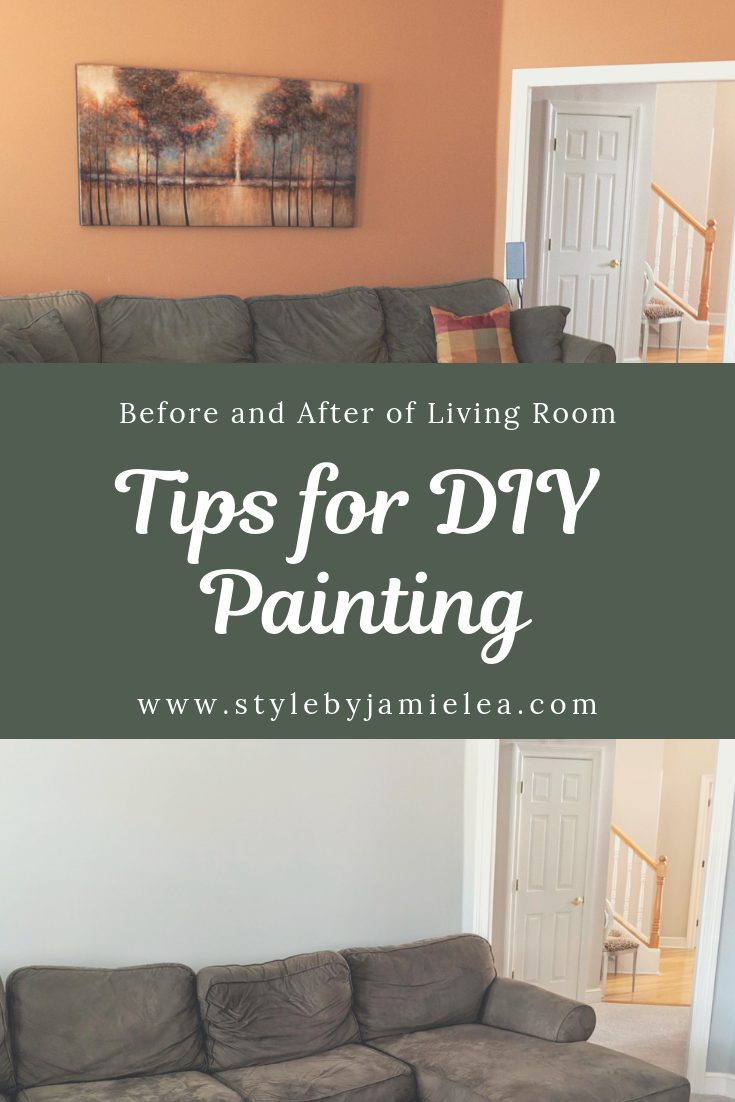
 Hey ladies! I had lots of people interested in my recent project I did on my living room. Whenever that happens I always ask if people want a post written about it. The answer was yes, so here we are! You are about to get some tips on painting a room all by yourself! It really is a lot harder than it looks. I am going to give you tips on making the entire process a whole lot smoother and more enjoyable.
I used the color Metropolitan by Benjamin Moore. It is actually the Color of the Year chosen by Benjamin Moore. I did not plan this. It just so happened to be the best color in the room. We looked at SEVERAL gray colors and this one was it. Gray is the hardest color to choose because it changes so drastically with it’s surroundings and with different lighting. We are very happy with it!
What Manufacturer are You Going to Use
Years ago I did an experiment when my husband and I purchased our first house. I started with a cheaper paint and went up in quality with each room I did. I wanted to see for myself if there was a difference in quality. Boy is there ever! I was blown away by the differences. The most expensive paint you can buy is the Aura Paint from Benjamin Moore. They have a step down from that but I do not believe it is as good. Let me tell you why.
- Aura will cover in two coats no matter what and needs no primer. This is the best of it’s kind.
- A little goes a LONG way!
- Aura will allow you to apply a second coat in an hour.
- There is literally no odor at all to this paint.
- The trick to using this paint is to keep your roller covered and if it starts to feel sticky on the wall reload it. The paint dries fast so if you continue to roll over it you will pull the paint off. I have done this. Keep that roller wet. Oh and use the special Aura roller cover for the best results.
Picking Your Color
Gather the paint colors you want to evaluate. Do your evaluation in the room you are painting. Look at it in the daytime and evening. Once you have narrowed down your color selection go get samples. If you can paint the sample on the wall directly I recommend doing so. If not, they sell Spot On Removable Decals at Lowes that you can paint and stick to the wall. This is what I used. I only used one per room and I would actually recommend painting 4 of them so you can put them together and make a larger square. They will peel right off your wall not problem so no worries! Again, check your color on the walls in the daytime and the evening.
Supplies
- Wear clothing you are willing to get paint on. You can also wear an apron.
- Have a little stool handy if you have one.
- Towels for cleaning the walls and potential spills
- Non abrasive gentle cleaner for the walls or just water if you prefer
- Green Frog Tape
- Spackling
- Spackling tool
- 100-150 grit sandpaper
- Roller
- Extender for Roller if you have high ceilings
- Roller Cover
- Paint pan and lid
- Edging Brush ( the bristles are slanted)
- Scaffolding if you feel like you need it. It is much better than a ladder for edging near the ceiling.
- A bucket and liners for your edging paint
- A couple of cloth drop cloths and some throw away plastic ones
- Bucket with lid for mixing multiple cans
- Paint Can Opener
- Screwdriver to remove any outlet covers
- Trash bags for trash
- Paint – measure the square footage to your room and buy the proper number of gallons to cover that square footage.
How to Paint
- Clear the room as much as you can and then move whatever is left to the center of the room and cover it with drop cloths. Do not skip covering what is in the room. Pro Tip: Cover your floors from the walls to a few feet out. You WILL drip paint, so this will protect your valuables from paint stains!
- Remove all covers to outlets in the room and put them in a Ziploc bag so they don’t get lost.
- Clean the walls with a towel and a gentle cleaner or just water. Wipe down walls, molding and baseboards.
- Cover any holes with spackling. Let it dry and then you will need to sand it down. If you leave too much on the wall it will show through the paint and look like a raised bubble on the wall. Leave enough to just cover the hole. It should feel very smooth and flat when you run your hand over it. Vacuum any dust when finished.
- Cover the edge of the ceiling or crown molding with tape. If you have textured ceilings you will not want to tape them, so you will have to be very careful when edging near the ceiling. Rub along the tape with your finger a few times to get it secured to the molding to prevent bleed through because of bubbles. Pro Tip: Try to get your edge as straight across as you can. It helps me to rip off smaller sections of tape and overlap them at the edges.
- Paint can vary slightly in color per gallon so if you have multiple gallons mix them together in the bucket. Keep this covered so it does not dry out.
- Set up drop clothes around the floor where you will paint to prevent drips from getting on the floor. Don’t skip this part because drips will happen!
- Set up scaffolding and have a stool nearby if you need it. I have linked some scaffolding that is great for residential jobs. You will be very surprised at how much this helps get the job completed faster!
- Paint one wall at a time. Put paint in your edging container and edge everything first. Make sure your edging has no drips or lines. Your edging should be dry by the time you paint the remainder of the wall. Pro Tip: The brush will work better for edging if it has a slight slant to the bristles.
- When you are finished edging go ahead and use the roller to cover the remainder of the wall. Start in the same spot as you did when you edged.
- If you use Aura like I suggested, only make a few up and down passes in one 3 to 4 foot area with the roller and then reapply paint to the roller. Check for any lines created as you roll and fix those immediately before the paint dries.
- Do the same process for the second coat. Check what the dry time is on the paint to see when you can add a second coat. For Benjamin Moore Aura Paint it is one hour.
- SLOWLY pull the tape off of the baseboards and molding as soon as you are done. The longer the tape stays with dry paint the harder it will be to get it off. It can also pull the paint off the wall if it’s too dry.
- Check for any spots that might need a touch up on your edging. Pulling the tape off can surprise you sometimes.
- Wait a few days to put the covers to the outlets back on. The paint needs to fully dry.
- Enjoy your new beautiful painted room!
I don’t know if you have ever hired a painter but if you have you know how expensive it can be. You can save yourself lots of money by just doing it yourself. It does take a lot of time but you will feel very accomplished and rewarded when you are finished. I painted every room in my last house and am slowly working on this one. If you follow my advice it will make a huge difference in the entire process and the outcome.
Please let me know in the comments below if you have any questions at all about DIY painting. Hope you enjoyed this one!
Thanks for reading!


2 Comments
This is such a useful blog post- definitely not one of your usual fashion posts. However I enjoyed reading it and appreciated how detailed you were.
Thank you Komal. I had so many people on Instagram interested in this. Kinda weird so you never know.